APPLICATION NOTE NO. 57
I/O Connector Care and Installation
Revised May 2003

Application
note in pdf format
The Application Note describes the proper care and installation of standard
I/O connectors for Sea-Bird CTD instruments. Once properly installed, the connections
require minimal care. Unless access to the bulkhead is required, the connections can be
left in place indefinitely. The Application Note is divided into three sections:
Carefully clean the bulkhead connector and the inside of the
mating inline (cable end) connector with a Kimwipe. Remove all grease, hair, dirt, and other contamination.
|
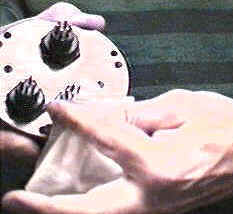
Clean bulkhead connector |
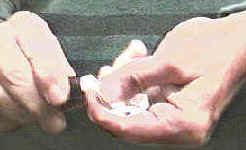
Clean inside of connector |
- Inspect the connectors:
- Inspect the pins on the bulkhead connector for signs of
corrosion. The pins should be bright and shiny, with no discoloration. If the pins are discolored or corroded, clean
with alcohol and a Q-tip.
- Inspect the bulkhead connector for chips, cracks, or
other flaws that may compromise the seal.
- Inspect the inline connector for cuts, nicks, breaks, or other problems
that may compromise the seal.
Replace severely corroded bulkhead connectors -- contact SBE for
instructions, or a Return Authorization Number (RMA number).

Corroded pins on bulkhead connectors -- Connector on right has a missing
pin
- Using a tube of 100% silicone grease (Dow DC-4 or equivalent),
squeeze approximately half the size of a pea onto the end of your finger.
CAUTION: Do not use WD-40 or other petroleum-based lubricants, as they
will damage the connectors.

100% silicone grease
- Apply a light, even coating of grease to the molded ridge around the base of the
bulkhead connector. The ridge looks like an o-ring molded into the bulkhead connector base and fits into the groove
of the mating inline connector.
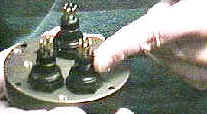
Apply grease to molded ridge
Mate the inline connector to the bulkhead, being careful to
align the pins with the sockets. Do not twist the inline connector on the bulkhead connector. Twisting can lead to bent pins, which will
soon break.
Push the connector all the way onto the bulkhead. There may be an audible pop, which
is good. With some newer cables, or in cold weather, there may not be an initial audible pop.
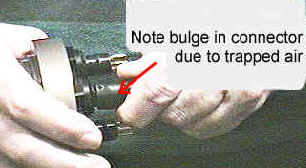
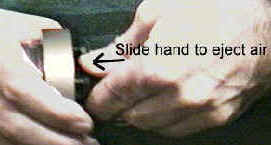
- After the cable is mated, run your fingers along the inline connector
toward the bulkhead, milking any trapped air out of the connector. You should hear the air being ejected.
CAUTION: Failure to eject the trapped air will result in the connector
leaking.

After the connectors are mated, install the locking sleeve.
The locking sleeve secures the inline connector to the bulkhead connector and
prevents the cable from being inadvertently removed.
Important points regarding locking sleeves:
- Tighten the locking sleeve by hand. DO NOT use a wrench or pliers to tighten the locking sleeve.
Overtightening will gall the threads, which can
bind the locking sleeve to the bulkhead connector. Attempting to remove a tightly bound locking sleeve may
instead result in the bulkhead connector actually unthreading from the end cap. A loose
bulkhead connector will lead to a
flooded instrument. Pay particular attention when removing a locking sleeve to
ensure the bulkhead
connector is not loosened.
- It is a common misconception that the locking sleeve provides
watertight integrity. It does not, and continued re-tightening of the locking sleeve will not
fix a leaking connector.
- As part of routine maintenance at the end of every
cruise, remove the locking sleeve, slide it up the cable, and rinse the
connection
(still mated) with fresh water. This will prevent premature cable failure.
In cold weather, the connectors may be hard to install and
remove.
Removing a frozen inline connector:
- Wrap the connector with a washrag or other cloth.
- Pour hot water on the cloth and let the connector sit for a minute or two. The connector
should thaw and become flexible enough to be removed.
Installing an inline connector:
When possible, mate connectors in warm environments before the cruise and leave them
connected.
If not,
warm the connector sufficiently so it is flexible. A
flexible connector will install properly.
By following these procedures, you will have many years of
reliable service from your cables!

Last modified:
06 Apr 2007
Sea-Bird Home Phone: 425-643-9866
Fax: 425-643-9954 E-mail:
seabird@seabird.com
![]()

![]()